2026
How to Build an AI Storyboard Scene by Scene
Reading time: 10 minutes | For: filmmakers, animators, visual storytellers
The problem with most AI video workflows isn't the generation. It's what happens before it.
Most creators open a tool, type a prompt, watch a clip, decide it's not quite right, and generate again. Twelve generations later, they have a folder full of footage that doesn't connect — and a credit balance that took a hit. What's missing isn't better AI. It's the same thing missing from every production workflow that falls apart: a storyboard.
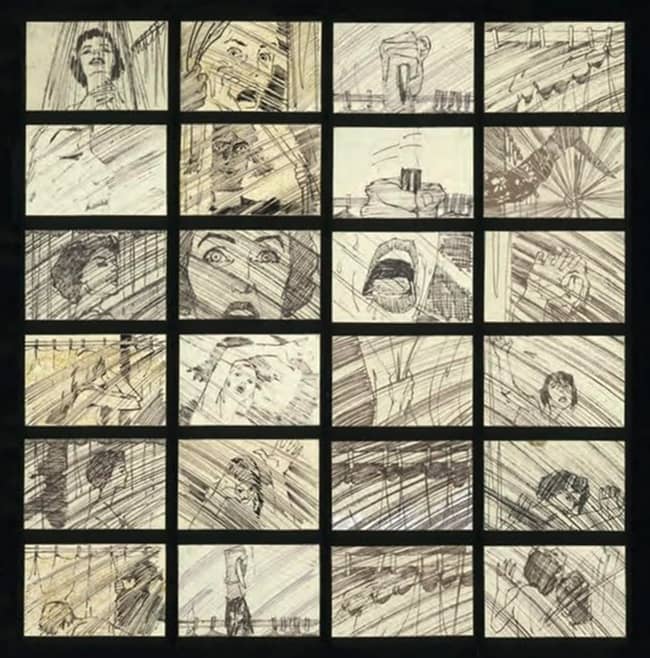
Storyboarding isn't a relic of analog filmmaking. It's the cheapest form of iteration available. Sketch the story first, move things around, find the problems before you commit resources to solving them. That principle holds whether you're planning a $40M feature or a 90-second AI narrative for your social channel.
This guide covers how to build an AI storyboard the right way — scene by scene, before a single frame of video is generated.
The problem with most AI video workflows isn't the generation. It's what happens before it.
Most creators open a tool, type a prompt, watch a clip, decide it's not quite right, and generate again. Twelve generations later, they have a folder full of footage that doesn't connect — and a credit balance that took a hit. What's missing isn't better AI. It's the same thing missing from every production workflow that falls apart: a storyboard.
Storyboarding isn't a relic of analog filmmaking. It's the cheapest form of iteration available. Sketch the story first, move things around, find the problems before you commit resources to solving them. That principle holds whether you're planning a $40M feature or a 90-second AI narrative for your social channel.
This guide covers how to build an AI storyboard the right way — scene by scene, before a single frame of video is generated.
What "Scene by Scene" Actually Means
A common mistake is treating storyboarding as a shot list. Shots and scenes aren't the same thing.
A shot is a single camera angle — a close-up, a wide, a pan. A scene is a narrative unit: a place, a moment, a turn in the story. One scene may contain several shots in a finished film, but in the storyboard phase you're working at the scene level. The question is: what happens here, and what needs to be visible for the audience to feel it?
Working scene by scene keeps you focused on story structure rather than cinematographic detail. You're not deciding whether the camera slowly pushes in — you're deciding whether this scene needs to exist at all. That decision costs nothing at the storyboard stage. It costs a lot after you've generated footage.
A shot is a single camera angle — a close-up, a wide, a pan. A scene is a narrative unit: a place, a moment, a turn in the story. One scene may contain several shots in a finished film, but in the storyboard phase you're working at the scene level. The question is: what happens here, and what needs to be visible for the audience to feel it?
Working scene by scene keeps you focused on story structure rather than cinematographic detail. You're not deciding whether the camera slowly pushes in — you're deciding whether this scene needs to exist at all. That decision costs nothing at the storyboard stage. It costs a lot after you've generated footage.
The Workflow: From Concept to Visual Sequence
Step 1 — Write the Story in Plain Language
You don't need a polished script. You need enough to define each scene's purpose.
One to three sentences per scene is plenty at this stage. Focus on what happens, who's in it, and what the emotional or narrative beat is. Avoid cinematographic language — "close-up on her hands" is a shot decision that doesn't belong here yet. "She notices the letter is already open" is a story beat that belongs in every version of this scene.
Example for a 5-scene narrative:
Scene 1: An empty apartment. Late afternoon light. Evidence of someone who left in a hurry.
Scene 2: A woman stands in the doorway, reading a note. Her expression is unreadable.
Scene 3: Exterior of the building. She walks out carrying nothing.
Scene 4: A train platform. Crowds move around her while she stands still.
Scene 5: A window seat on a moving train. She finally looks out.
This is a complete story structure in five sentences. You know the arc. You know what each scene needs to communicate. You haven't spent a credit yet.
Step 2 — Break It Into Scenes in Your Storyboard Tool
Once the narrative is mapped, enter each scene as its own card in your storyboard. Each card should carry a scene description (what's in the frame, what's happening), technical notes (tone, lighting, style cues), and sequence position (where this scene falls in the overall flow).
The value of the card structure is that reordering is free. Moving Scene 3 to Scene 1 is a drag. Discovering that Scene 3 should be Scene 1 after you've generated video for it is expensive — and usually means you just live with the wrong order.
Step 3 — Generate Still Frames First
Before any video generation happens, generate a still frame for each scene. This is where AI earns its place in the workflow — not as a video generator, but as a visualization layer.
A still frame per scene gives you a visual proof-of-concept. You can see immediately whether the aesthetic is consistent, whether the visual tone matches the story beat, whether the composition is going to work. You can iterate on prompts fast and cheap, because still image generation costs a fraction of video generation.
Flux-generated stills and illustrated frames — including B&W pre-visualization aesthetics — let you build an animatic-style overview of the entire story before committing to a single second of video. Think of it as a printed storyboard that generates itself.
This is the step most AI video creators skip. It's the most valuable step in the sequence.
Step 4 — Review the Visual Flow as a Sequence
Once every scene has a still frame, play through the storyboard as a sequence. You're not evaluating individual frames — you're evaluating whether the visual story makes sense from beginning to end.
Ask: Does the visual tone stay consistent? Does each image clearly communicate its scene's beat? If a frame were pulled from context, would a viewer understand its place in the arc?
This review costs nothing. Adjustments at this stage — swapping a frame, rewriting a scene description, dropping a scene that isn't pulling its weight — are still free. You haven't generated video yet.
Step 5 — Generate Video Only When the Story Is Locked
The sequence is reviewed. The frames work. The story makes visual sense. Now generate video.
At this point you're not experimenting — you're executing. Each scene has a proven still frame that defines the visual direction. Your video prompt is informed by what already works. You're running Veo3 or Runway against a specific, validated brief — not against a vague idea that might not be right.
This is the step where the storyboard-first workflow pays for itself. You've spent credits on still frames. You've saved credits on every video generation that didn't happen because a scene got dropped or revised before you committed. For a detailed breakdown of how much this saves on Veo3 and Runway Gen4, see How to Cut Veo3 Generation Costs with a Storyboard-First Workflow.
You don't need a polished script. You need enough to define each scene's purpose.
One to three sentences per scene is plenty at this stage. Focus on what happens, who's in it, and what the emotional or narrative beat is. Avoid cinematographic language — "close-up on her hands" is a shot decision that doesn't belong here yet. "She notices the letter is already open" is a story beat that belongs in every version of this scene.
Example for a 5-scene narrative:
Scene 1: An empty apartment. Late afternoon light. Evidence of someone who left in a hurry.
Scene 2: A woman stands in the doorway, reading a note. Her expression is unreadable.
Scene 3: Exterior of the building. She walks out carrying nothing.
Scene 4: A train platform. Crowds move around her while she stands still.
Scene 5: A window seat on a moving train. She finally looks out.
This is a complete story structure in five sentences. You know the arc. You know what each scene needs to communicate. You haven't spent a credit yet.
Step 2 — Break It Into Scenes in Your Storyboard Tool
Once the narrative is mapped, enter each scene as its own card in your storyboard. Each card should carry a scene description (what's in the frame, what's happening), technical notes (tone, lighting, style cues), and sequence position (where this scene falls in the overall flow).
The value of the card structure is that reordering is free. Moving Scene 3 to Scene 1 is a drag. Discovering that Scene 3 should be Scene 1 after you've generated video for it is expensive — and usually means you just live with the wrong order.
Step 3 — Generate Still Frames First
Before any video generation happens, generate a still frame for each scene. This is where AI earns its place in the workflow — not as a video generator, but as a visualization layer.
A still frame per scene gives you a visual proof-of-concept. You can see immediately whether the aesthetic is consistent, whether the visual tone matches the story beat, whether the composition is going to work. You can iterate on prompts fast and cheap, because still image generation costs a fraction of video generation.
Flux-generated stills and illustrated frames — including B&W pre-visualization aesthetics — let you build an animatic-style overview of the entire story before committing to a single second of video. Think of it as a printed storyboard that generates itself.
This is the step most AI video creators skip. It's the most valuable step in the sequence.
Step 4 — Review the Visual Flow as a Sequence
Once every scene has a still frame, play through the storyboard as a sequence. You're not evaluating individual frames — you're evaluating whether the visual story makes sense from beginning to end.
Ask: Does the visual tone stay consistent? Does each image clearly communicate its scene's beat? If a frame were pulled from context, would a viewer understand its place in the arc?
This review costs nothing. Adjustments at this stage — swapping a frame, rewriting a scene description, dropping a scene that isn't pulling its weight — are still free. You haven't generated video yet.
Step 5 — Generate Video Only When the Story Is Locked
The sequence is reviewed. The frames work. The story makes visual sense. Now generate video.
At this point you're not experimenting — you're executing. Each scene has a proven still frame that defines the visual direction. Your video prompt is informed by what already works. You're running Veo3 or Runway against a specific, validated brief — not against a vague idea that might not be right.
This is the step where the storyboard-first workflow pays for itself. You've spent credits on still frames. You've saved credits on every video generation that didn't happen because a scene got dropped or revised before you committed. For a detailed breakdown of how much this saves on Veo3 and Runway Gen4, see How to Cut Veo3 Generation Costs with a Storyboard-First Workflow.
Choosing an AI Storyboard Tool
The right tool depends on what stage you’re optimizing for. Most AI video tools are built around generation — they’re optimized for the moment you commit to a clip. What you need for this workflow is a tool that’s built around the planning stage.
A few categories worth knowing:
Traditional storyboard software (Boords, StudioBinder): Good for frame-by-frame shot planning and team collaboration. Not built for AI generation — you’re uploading manually drawn or sourced frames, not generating them. Strong if you have illustrators on the team or are adapting an existing script.
AI image generators used standalone (Midjourney, Stable Diffusion, Flux): Capable of producing high-quality still frames, but they’re not storyboard tools. You generate images in one place and manage them somewhere else. No scene structure, no sequencing, no workflow between image and video generation.
AI video tools with storyboard features (Runway, Pika): These are primarily video generation tools that have added lightweight scene management. They work well once you know what you’re generating; they’re not designed for the pre-production planning phase where the story is still changing.
Dedicated AI storyboard tools (Storyline Forge): Built specifically for the storyboard-first workflow — scene cards, AI still frame generation per scene, and then video generation once the sequence is locked. Free tier uses your own Replicate API key (your key stays in your browser, never sent to their servers). Paid plans add managed credits for Veo3, Runway Gen4 Turbo, and Runway Gen4 Aleph when you’re ready to generate video.
For a full comparison of available options across all these categories, see Best AI Storyboard Tools in 2026 (Tested & Compared).
A few categories worth knowing:
Traditional storyboard software (Boords, StudioBinder): Good for frame-by-frame shot planning and team collaboration. Not built for AI generation — you’re uploading manually drawn or sourced frames, not generating them. Strong if you have illustrators on the team or are adapting an existing script.
AI image generators used standalone (Midjourney, Stable Diffusion, Flux): Capable of producing high-quality still frames, but they’re not storyboard tools. You generate images in one place and manage them somewhere else. No scene structure, no sequencing, no workflow between image and video generation.
AI video tools with storyboard features (Runway, Pika): These are primarily video generation tools that have added lightweight scene management. They work well once you know what you’re generating; they’re not designed for the pre-production planning phase where the story is still changing.
Dedicated AI storyboard tools (Storyline Forge): Built specifically for the storyboard-first workflow — scene cards, AI still frame generation per scene, and then video generation once the sequence is locked. Free tier uses your own Replicate API key (your key stays in your browser, never sent to their servers). Paid plans add managed credits for Veo3, Runway Gen4 Turbo, and Runway Gen4 Aleph when you’re ready to generate video.
For a full comparison of available options across all these categories, see Best AI Storyboard Tools in 2026 (Tested & Compared).
Name your subjects consistently. If Scene 1 has "a woman in a grey coat," Scenes 2–5 should also say "the woman in a grey coat," not "she" or "a figure." AI image models don't carry context between generations — they read each prompt fresh. Consistent naming is how you maintain subject continuity across a sequence.
Common Mistakes That Slow Down the Storyboard Phase
Starting with video generation instead of still frames. This is the most common error and the most expensive. Veo3 and Runway Gen4 both cost meaningful credits per clip. Flux or Stable Diffusion stills cost a fraction of that, or nothing if you're on a plan that includes them. Any scene that gets dropped after the storyboard review — and some always do — should have been dropped before a video was generated for it.
Planning too many scenes. Most short-form AI video narratives work in three to five scenes. More than that and you're making a short film, which requires a different production approach. At the storyboard stage, it's tempting to keep adding scenes because it costs nothing — but every scene you plan is a scene you might generate. Stay disciplined about the minimum number of scenes that tell the story.
Treating the storyboard as the deliverable. The storyboard is a planning tool. Over-optimizing still frames — regenerating them repeatedly, fine-tuning palettes across six iterations — is a form of productive avoidance. The test for "ready to move on" is simple: if someone unfamiliar with the project saw this sequence of frames, would they understand the story? If yes, generate. If no, fix the specific thing that's unclear.
Skipping the sequence review. Evaluating frames individually and evaluating them as a sequence are different exercises. A frame that looks strong in isolation may be the wrong visual transition from the frame before it, or may introduce a tonal shift that breaks the flow. Always play through the full storyboard as a sequence before committing to video generation.
What Makes a Good Scene Description for AI Generation
AI generation has no access to your intent — only your words. A description that feels clear to you may produce an unusable frame because the model has no context outside the text you give it.
Four rules that hold across models:
Describe what's visible, not what's felt. "A sense of dread" produces nothing usable. "An empty hallway, a single light flickering at the far end, door ajar" produces a frame. Translate every emotional beat into its visible equivalent before writing the description.
Anchor the visual style in Scene 1, then repeat it explicitly. If Scene 1 is "desaturated, high-contrast, overcast daylight," every subsequent scene should reference those same terms. Models don't inherit context between generations — each prompt starts cold.
Separate atmosphere from camera movement. "Low key lighting, deep shadows" is a frame instruction. "Slow push in toward her face" is a shot decision for production, and meaningless to an image generator. Keep camera language out of the storyboard stage.
Rewrite the description before you regenerate. If a frame isn't working, the description is almost always the cause. Change it, then regenerate. Running the same text again rarely produces a meaningfully different result.
Four rules that hold across models:
Describe what's visible, not what's felt. "A sense of dread" produces nothing usable. "An empty hallway, a single light flickering at the far end, door ajar" produces a frame. Translate every emotional beat into its visible equivalent before writing the description.
Anchor the visual style in Scene 1, then repeat it explicitly. If Scene 1 is "desaturated, high-contrast, overcast daylight," every subsequent scene should reference those same terms. Models don't inherit context between generations — each prompt starts cold.
Separate atmosphere from camera movement. "Low key lighting, deep shadows" is a frame instruction. "Slow push in toward her face" is a shot decision for production, and meaningless to an image generator. Keep camera language out of the storyboard stage.
Rewrite the description before you regenerate. If a frame isn't working, the description is almost always the cause. Change it, then regenerate. Running the same text again rarely produces a meaningfully different result.
When to Iterate vs. When to Commit
The storyboard stage has a natural stopping point that's easy to blow past: when the story is clear, stop iterating and generate.
Over-storyboarding is a real failure mode. You can spend an entire session adjusting scene descriptions and regenerating still frames without ever producing video. The storyboard is a planning tool, not a deliverable.
The test for "ready to move on" is simple: if someone unfamiliar with the project saw this sequence of frames, would they understand the story?
If yes, you're done planning. Generate.
If no, the problem is almost always one of two things: a scene description that doesn't clearly communicate its narrative beat, or a scene that simply shouldn't exist. Fix those, then generate.
Over-storyboarding is a real failure mode. You can spend an entire session adjusting scene descriptions and regenerating still frames without ever producing video. The storyboard is a planning tool, not a deliverable.
The test for "ready to move on" is simple: if someone unfamiliar with the project saw this sequence of frames, would they understand the story?
If yes, you're done planning. Generate.
If no, the problem is almost always one of two things: a scene description that doesn't clearly communicate its narrative beat, or a scene that simply shouldn't exist. Fix those, then generate.
Scene Description vs. Image Prompt
These are not the same input. Conflating them is one of the most common reasons storyboards produce inconsistent frames.
A scene description is written for yourself. It explains what the scene is, what happens in it, and what it needs to communicate. It can include character intent, narrative context, and emotional subtext — things that clarify the story logic. Example:
Maria discovers the apartment has been emptied. She expected to find him. The scene should feel like something has already ended.
An image prompt is written for the model. It contains only what can be rendered: subjects, environment, lighting, palette, style. It strips out intent and narrative entirely. Example:
Empty apartment interior, afternoon light through bare windows, scattered packing paper on the floor, desaturated palette, cinematic, quiet.
Write the scene description first to lock the story beat. Then translate it into an image prompt. That translation is where most of the creative work happens — and the step most creators skip.
In Storyline Forge, scene cards carry both fields separately. The description field holds your narrative brief. The image prompt field is what goes to the model. Treating them as the same input produces prompts that are too narrative for image generation and frames that don't serve the story.
Frequently Asked Questions
What is an AI storyboard, and how is it different from a regular storyboard?
A traditional storyboard uses hand-drawn or photographed frames to plan a shot sequence before production. An AI storyboard uses the same planning structure — scene cards, sequence order, narrative beats — but generates still frames using an AI image model rather than drawing them. The workflow is the same; what changes is how fast and cheaply you can produce a visual reference for each scene. For filmmakers who aren't illustrators, AI-generated frames remove the bottleneck of having to draw or source reference images manually.
What's the best free AI storyboard tool?
Storyline Forge offers a free tier that uses your own Replicate API key — you connect your key, generate still frames using models like Flux, and build full scene-by-scene storyboards at no monthly cost. Your API key stays in your browser and is never stored on their servers. Other options include building a manual storyboard in Boords (free tier limited to 2 storyboards) or using a standalone image generator like Midjourney to produce frames you then manage separately. The Storyline Forge free tier is the only option purpose-built for the storyboard-first video workflow.
Can I use Replicate with a storyboard tool?
Yes. Storyline Forge's free tier is built specifically around Replicate — you bring your own API key and use it to generate still frames directly within the storyboard interface. Your key is stored locally in your browser only; it is not transmitted to or stored on any server. This means you pay Replicate directly at cost for any generations, with no subscription markup.
How many scenes should an AI storyboard have?
For short-form social content and narrative experiments, three to five scenes is the right target. It's enough to establish a beginning, middle, and end — and it keeps the production scope manageable for solo creators. Longer formats (10+ scenes) are better suited to projects where you have a team or are specifically creating a longer-form short film. At the storyboard stage, the discipline is to use the fewest scenes that tell the story completely, not the most scenes that could theoretically exist in it.
How is an AI storyboard tool different from an AI video generator?
An AI video generator (Veo3, Runway Gen4, Pika) is designed to produce video clips from text prompts or still images. An AI storyboard tool is designed for the planning phase that comes before video generation — structuring your narrative into scenes, generating low-cost still frames to validate the visual direction, and only committing to video generation once the sequence is confirmed. The two tools serve different stages of the same workflow. Using a storyboard tool before your video generator is how you avoid generating the same scene six times to get it right.
A traditional storyboard uses hand-drawn or photographed frames to plan a shot sequence before production. An AI storyboard uses the same planning structure — scene cards, sequence order, narrative beats — but generates still frames using an AI image model rather than drawing them. The workflow is the same; what changes is how fast and cheaply you can produce a visual reference for each scene. For filmmakers who aren't illustrators, AI-generated frames remove the bottleneck of having to draw or source reference images manually.
What's the best free AI storyboard tool?
Storyline Forge offers a free tier that uses your own Replicate API key — you connect your key, generate still frames using models like Flux, and build full scene-by-scene storyboards at no monthly cost. Your API key stays in your browser and is never stored on their servers. Other options include building a manual storyboard in Boords (free tier limited to 2 storyboards) or using a standalone image generator like Midjourney to produce frames you then manage separately. The Storyline Forge free tier is the only option purpose-built for the storyboard-first video workflow.
Can I use Replicate with a storyboard tool?
Yes. Storyline Forge's free tier is built specifically around Replicate — you bring your own API key and use it to generate still frames directly within the storyboard interface. Your key is stored locally in your browser only; it is not transmitted to or stored on any server. This means you pay Replicate directly at cost for any generations, with no subscription markup.
How many scenes should an AI storyboard have?
For short-form social content and narrative experiments, three to five scenes is the right target. It's enough to establish a beginning, middle, and end — and it keeps the production scope manageable for solo creators. Longer formats (10+ scenes) are better suited to projects where you have a team or are specifically creating a longer-form short film. At the storyboard stage, the discipline is to use the fewest scenes that tell the story completely, not the most scenes that could theoretically exist in it.
How is an AI storyboard tool different from an AI video generator?
An AI video generator (Veo3, Runway Gen4, Pika) is designed to produce video clips from text prompts or still images. An AI storyboard tool is designed for the planning phase that comes before video generation — structuring your narrative into scenes, generating low-cost still frames to validate the visual direction, and only committing to video generation once the sequence is confirmed. The two tools serve different stages of the same workflow. Using a storyboard tool before your video generator is how you avoid generating the same scene six times to get it right.
Getting Started
Storyline Forge is built around this exact workflow — scene-by-scene storyboards, AI still frame generation per scene, and then video generation once the sequence is locked. The free tier uses your own Replicate API key; your key stays in your browser and is never sent to their servers. Paid plans add managed credit pools for Veo3, Runway Gen4 Turbo, and Runway Gen4 Aleph.
The /storyboard page at storylineforge.com/storyboard shows the full workflow in action without requiring a login.
If you want a broader look at how this approach fits within the larger category of AI video pre-production — including how professional filmmakers are using AI for previsualization and scene planning — see AI Pre-Visualization for Film: Tools and Workflows in 2026.
Start your first storyboard free →
The /storyboard page at storylineforge.com/storyboard shows the full workflow in action without requiring a login.
If you want a broader look at how this approach fits within the larger category of AI video pre-production — including how professional filmmakers are using AI for previsualization and scene planning — see AI Pre-Visualization for Film: Tools and Workflows in 2026.
Start your first storyboard free →