Video Editor
Overview
The Video Editor lets you assemble your generated scene clips into a complete video sequence. Once you've generated video for your scenes in the Storyboard, open a project in the Editor to arrange clips, trim their in and out points, preview the full sequence, and export your finished video.
The editor is accessible directly from the Projects page — click the Open in Editor button on any project card. You must be signed in to access it.
Layout
The editor is divided into four main areas:
Media Bin
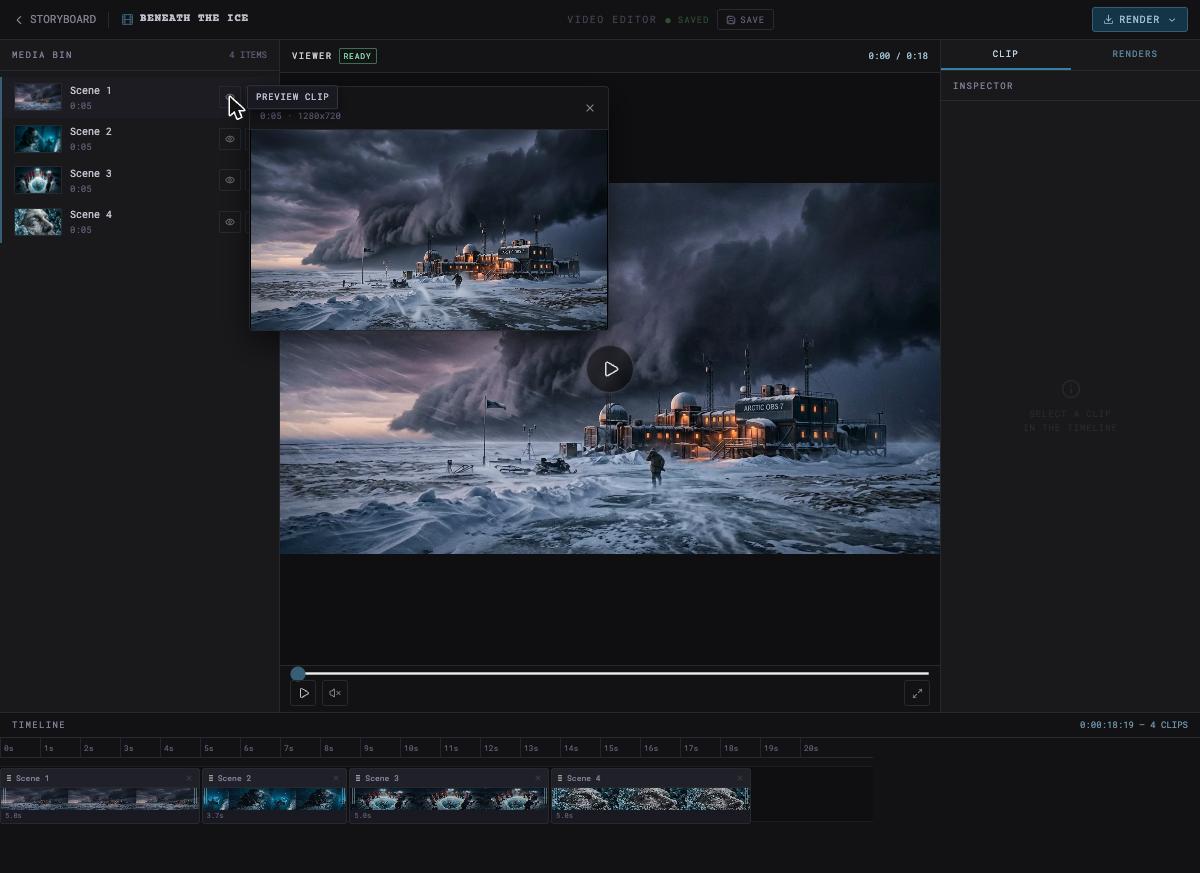
The left panel lists every scene in your project that has a generated video. Each clip shows a thumbnail, its scene name, and duration. Use the eye icon to open a quick preview popup showing the clip's frame, resolution, and duration. Use the − button to remove a clip from the timeline (it stays in the bin and can be re-added with +). Clips removed from the timeline are excluded from playback and exports.
The left panel lists every scene in your project that has a generated video. Each clip shows a thumbnail, its scene name, and duration. Use the eye icon to open a quick preview popup showing the clip's frame, resolution, and duration. Use the − button to remove a clip from the timeline (it stays in the bin and can be re-added with +). Clips removed from the timeline are excluded from playback and exports.
Viewer
The large center panel shows the current frame of your timeline. A status indicator (READY / BUFFERING) confirms when clips have loaded for playback. Controls at the bottom include play/pause, mute, a scrubber bar for jumping to any point, and a fullscreen button. The time counter shows your current position and total duration. Clicking anywhere on the scrubber jumps playback to that position; playback always resumes from the position you scrubbed to, not from the beginning.
The large center panel shows the current frame of your timeline. A status indicator (READY / BUFFERING) confirms when clips have loaded for playback. Controls at the bottom include play/pause, mute, a scrubber bar for jumping to any point, and a fullscreen button. The time counter shows your current position and total duration. Clicking anywhere on the scrubber jumps playback to that position; playback always resumes from the position you scrubbed to, not from the beginning.
Inspector
The right panel has two tabs.
The right panel has two tabs.
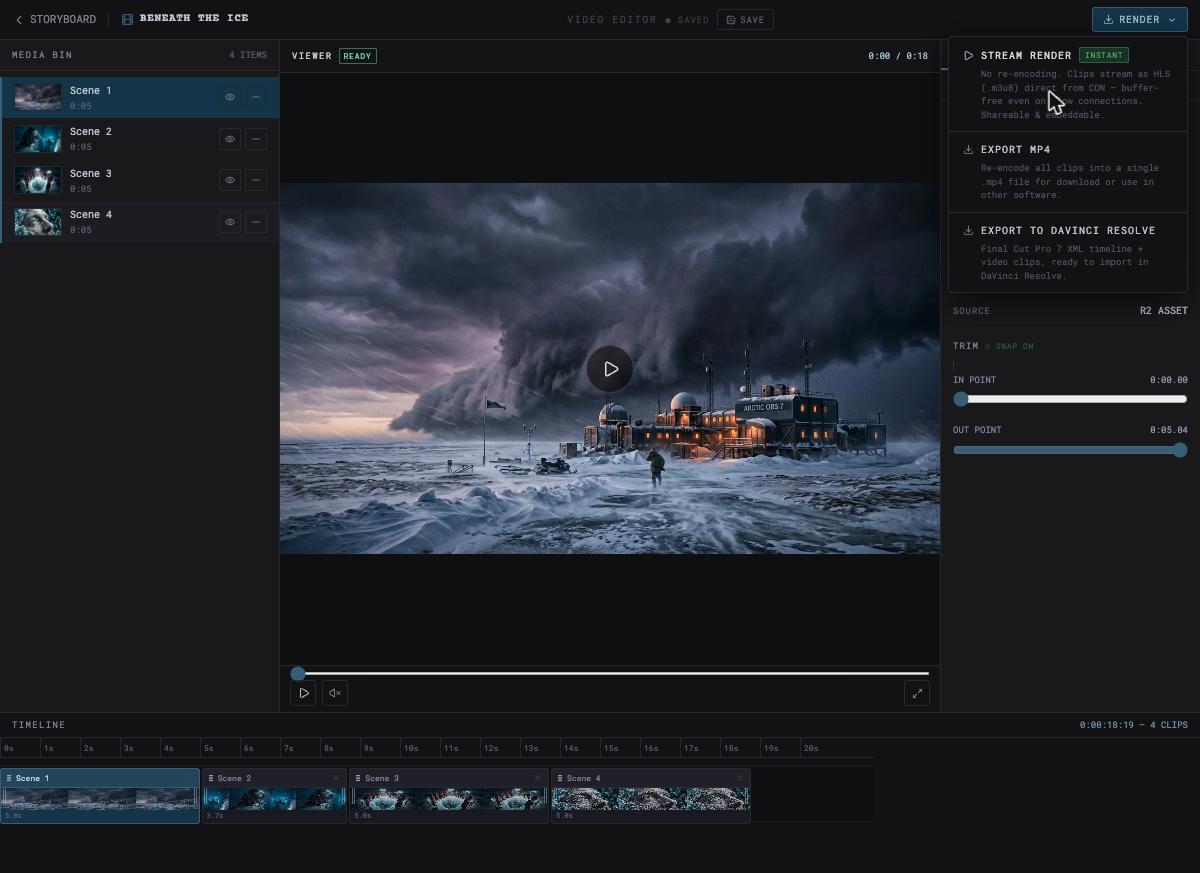
CLIP tab: becomes active when you click a clip in the Timeline. It shows clip metadata — duration, active duration after any trimming, codec, resolution, keyframes, and source — plus TRIM controls. Use the In Point and Out Point sliders to cut the start and end of a clip. The SNAP ON toggle snaps trim points to keyframe boundaries for cleaner cuts. Active Duration updates in real time as you drag, and the clip's length in the timeline reflects your changes immediately. Drag the sliders back to their original positions to revert a trim.
RENDERS tab: shows a history of completed MP4 exports for this project. When no exports have been made yet, it prompts you to use Export MP4 to create your first render.
Timeline
The bottom panel shows all clips in sequence as a horizontal strip of filmstrip thumbnails. The playhead tracks your current position. Total duration and clip count are shown in the top-right corner of the timeline. Clips can be reordered by dragging them to a new position; playback and exports reflect the new order immediately.
The bottom panel shows all clips in sequence as a horizontal strip of filmstrip thumbnails. The playhead tracks your current position. Total duration and clip count are shown in the top-right corner of the timeline. Clips can be reordered by dragging them to a new position; playback and exports reflect the new order immediately.

Saving
The header bar shows your current save status — SAVED or UNSAVED. Changes to clip order or trim points are not committed until you click the SAVE button. It's a good habit to save before exporting, but autosaving is quite aggressive.
Rendering and Exporting
Click the RENDER button in the top-right corner to open the render menu. Three options are available:
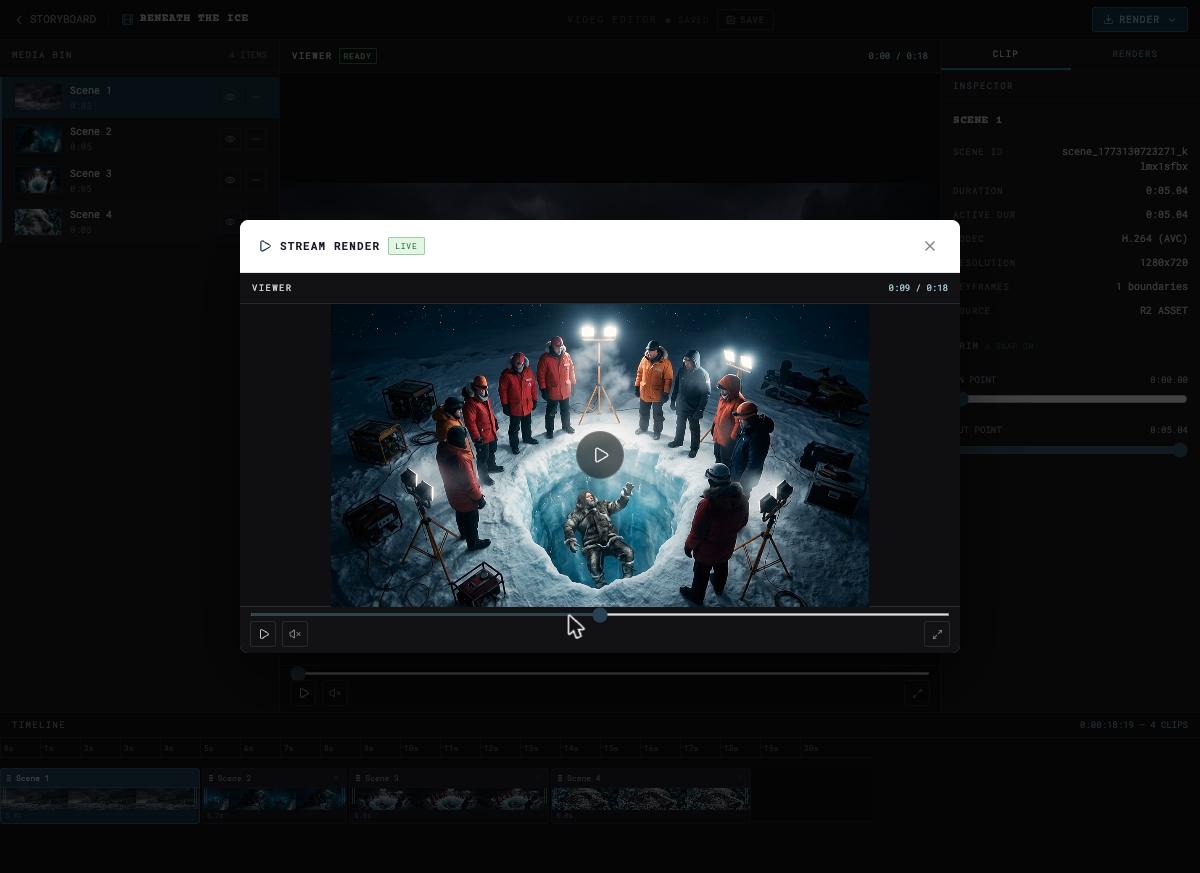
Stream Render renders your timeline instantly — no re-encoding required. Clips stream as HLS directly from the CDN, so playback is buffer-free even on slower connections. This opens a dedicated player modal where you can play, pause, scrub, and view the full sequence. Stream renders are shareable and embeddable.
Export MP4 re-encodes all timeline clips into a single .mp4 file for download. Use this when you need a self-contained video file to share, upload, or use in other software. Completed MP4 exports appear in the Renders tab.
Export to DaVinci Resolve packages a Final Cut Pro 7 XML timeline alongside your video clips in a ZIP file, ready to import directly into DaVinci Resolve. This is the recommended path if you want to continue editing in a professional NLE.
Flow Tips
- Generate video for your scenes in the Storyboard before opening the Editor. Scenes without generated video will not appear in the Media Bin.
- Use Stream Render for quick reviews before committing to an MP4 export.
- Trim clips to remove unwanted frames at the start or end of a shot without permanently altering your source asset.
- Reorder clips in the timeline to experiment with scene order: your storyboard sequence is the default, but the editor lets you try alternatives.
- Clips removed from the timeline stay in the Media Bin so you can add them back at any time without going back to the Storyboard.